Showing posts with label nails. Show all posts

Tuesday, April 12, 2011

Essie's Peach Daquiri Polish

I was trying to decide what color to paint my nails last week so I was going through my box of polish when I found this color. I purchased it during my last trip to visit my family in Utah and I guess I just forgot about it. Oopsies!


essie's peach daquiri


Anyway, I'm glad I rediscovered this color because it's now one of my current faves! The color is so bright and cheerful--perfect for spring and summer! I left it on my nails for nearly a week, which is sort of a long time for me these days!

Now the only question is, what polish should I try use next?


Pssst... Like this?
Subscribe in a reader | Like on Facebook | Follow on Bloglovin'

Tuesday, April 5, 2011

Across the Universe

It's the next chapter in my Deborah Lippmann love affair: Across the Universe. I simply adore this sparkly blue and green combo! What's even better about this particular shade is that if you upload a photo of yourself wearing it to lippmanncollection.com, they will make a donation to a charity called Discover the Journey.


deborah lippmann across the universe


Glitter Polish Tip
I noticed that with glitter polish, the application process is a bit different that non-glitter polish. I don't really swipe the brush across my nail as much as I use the brush to place the polish on my nail and space out the glitter before it dries. This will make it so that you end up with more glitter on the nail with fewer coats of polish.

Monday, March 28, 2011

Unbirthday

I threw myself a little happy unbirthday party and polished my nails with a little Happy Birthday by Deborah Lippmann! Whee!


deborah lippmann happy birthday


..and here is what I wore to the party.


032811


Black sunglasses - H&M | Green cardi - TJ Maxx | White ruffle top - Zara
Flared trouser jeans - Gap | Wooden sandals - Xhilaration 
Petal to the Metal Natasha bag - Marc by Marc Jacobs

Happy unbirthday to you!

Makeup Monday: H&M Spring Nails

I may have accidentally acquired seven new colors for my polish collection over the weekend--oops! I think I might have a problem...

Anyway, four of them came from H&M... how have I never noticed before that H&M has nail polish? I picked up the purple/coral mini-collection from their spring nails collection.

h&m spring nails 2011


Whenever I get a new color, I want to try it right away. But I only have two hands so my lovely roomie was kind enough to let me paint her nails with the coral color.

h&m spring nails coral 2011
 
I love it! I'm super stoked to try out the rest!


Have you tried out H&M polish before? Let me know what you think!

Tuesday, March 22, 2011

And the Winner Is...

First, let's get to the outfit post! I rocked a couple of the bracelets I made this weekend and I got so many compliments! Yay! What really surprised me though was how often I was told to open an Etsy shop... I dunno. What do you think? Could the stuff I make really sell?


032111

032111

032111

032111
Ack! Sorry for the blurry pic!

On the Wing of Love!


Black felt hat - Aqua from Bloomingdale's | Drape collar biker jacket - Mossimo
Tunic top - Mossimo | Black jeans - F21 | Black lace up boots - Leeds
Petal to the Metal Natasha - Marc by Marc Jacobs | Studded heart and jeweled wing rings | Therapy
DIY hex nut bracelet and smaller braided chain bracelet from a recent post
Polish - Miss Bossy Pants from Glee's OPI for Sephora line


And this post just keeps getting more exciting--it's time to announce the winner of my Sally Hansen Nail Strips giveaway! I want to thank everyone who entered! This was really fun for me and I'm super stoked to share the nail strip fun! So let's get to it.


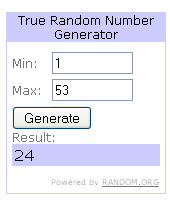
The lucky winner of five packages of Sally Hansen Nail Strips is...


Jenee! 

Congrats, Jenee! Email me at triplyksis [at] gmail [dot] com to claim your prize! Thanks again to all of my precious followers. I truly love having each and every one of you!

Sunday, March 13, 2011

Sally Hansen Nail Strips Giveaway

I've been so obsessed with Sally Hansen Salon Effects Nail Polish Strips lately--and I know I'm not the only one! My recent posts reviewing the houndstooth and lace print strips have been super popular. I also know lots of people still haven't been able to find these in their local stores so I've decided to give away a few packages of the strips in order to share the love!


One lucky winner will receive five packages of Sally Hansen Nail Polish Strips in Frock Star (multi-colored glitter), Kitty Kitty (leopard print), Cut it Out (black and white floral), Skinny Jeans (denim), and Check it Out (my favorite-houndstooth!).

Here's how to enter:
Follow my blog and leave a comment telling me your favorite nail polish brand/color.

Want an extra chance or two to win?
Become a fan of It's because I think too much on Facebook
Follow me on Twitter
Mention my giveaway on your blog (please post link)
Tweet about my giveaway

This giveaway will be open to entries until 9 pm PT on March 20, 2010.
The winner will be drawn at random and announced on this blog.

Good luck!

Monday, March 7, 2011

Beauty Review: Glee Chic Prints for Nails

glee polka dot nail strips


I've become a big fan of nail strips since trying out the Sally Hansen Salon Effects Nail Polish Strips. I snagged a set of polka dot print strips from Sephora a while back and I finally got around to trying them out this week.

glee polka dot nail strips


The Application Process
The process of putting them on is very similar to other strips I've tried in the past. With any brand, it's crucial that your nails are bare and clean of any natural oils. Picking a proper size strip for each nail is very easy because of the clear backing they are on; you can hold it over your fingernail and judge the size. Once you've picked a size, you rub the strip with your finger to heat it up, peel the strip off of the backing, then place on your nail. Rubbing out air bubbles is super easy and then you just use a nail file to remove the excess length.


glee polka dot nail strips


The Verdict
As I write this post, it is now day three of wearing the strips. I was disappointed with how quickly they tips started to wear off and the edge peeling up--it was the very next day! The print is constantly being complimented when I'm out and about. It's hard not to compare these strips to Sally Hansen's, but I've just got to. These are much thicker than the SH strips; a lot more like a sticker as opposed to actual polish. I put a top coat on today to try and get another extra day or two out of them, but the cost is just not worth how long they last. Final thought: Proceed with caution and try at your own risk!

Thursday, March 3, 2011

Beauty Review: OPI San Tan-Tonio

opi san tan-tonio


I snatched a bottle of OPI's San Tan-Tonio from their spring 2011 Texas collection while shopping with my sister in Utah this past weekend. I was so eager to try it out, I started painting my nails in in the car (no, I wasn't driving). After the first coat, I sort of had mannequin hands, but after a second coat, I had a perfectly creme-y light-brown finish. I think this color would probably compliment a variety of skin tones so I recommend you try it out even if you don't love the color the way it appears in the bottle--it looks way better on, right?

Have you tried any colors from this collection? Let me know which one is your fave!

Monday, February 28, 2011

Matte & Glossy


After my lime-green mani, I decided I wanted a something a little less bright and in-your-face. I went through my neutral polishes and picked out What's a Tire Jack? from Sephora by OPI. I decided that was a little too bland so I pulled out Essie's Matte About You top coat and used an art brush to paint a bit of the mattifying top coat in a zebra print pattern. The dual matte and glossy outcome was a lot more satisfying to me! The only down side is that this manicure didn't last more than a few days since I couldn't wear a top coat. Oh well, it was fun while it lasted!

Wednesday, February 23, 2011

Get Slushied and Gleek Out

I've tried a couple of the polish colors from the Glee for Sephora by OPI mini kit I bought a little while back.

Slushied is a creamy, opaque blue that goes on pretty well, but I did have to apply two coats to even it out.


Slushied


Gleek Out is a semi-sheer shimmering green that took three coats to get it to an opacity that I liked. The good thing is that it is pretty thin so three coats didn't become too thick.


Gleek Out


I also put Miss Bossy Pants on my toes, but who wants to see a picture of feet? ;) This semi-shimmery hot pink color is definitely my favorite of the three I've tried so far. I'll have to put it on my fingers soon so I can show you.

Have you tried any of the colors from this collection yet? Which is your fave?

And how did you feel about last night's episode? I was sort of uncomfortable with all the teenagers drinking!

Saturday, February 12, 2011

Shopping Haul - Glee Collection by OPI for Sephora


Just snatched up the Glee mini polish assortment and a set of nail strips from Sephora. The names of the colors are hilarious and awesome...

Miss Bossy Pants, Slushied, Celibacy Club, Gleek Out, Sue vs. Shue, and Express Yourself to Yourself--Love it!

So stoked to try them out. The question is which do I try first?

Friday, February 4, 2011

Back in Black (Lace)

It's more than official: I love Sally Hansen Nail Strips. I left my houndstooth nail strips on for as long as I could, just to see how long they would last. On day 7, I did end up putting a top coat on which helped make them last the full ten days the package claimed they would last.

On day 10, the part around my cuticles started lifting a bit so I decided to remove them. They came off pretty easily with nail polish remover.

Then it was time to put on my next pair; this time I chose the lace pattern. They seemed even easier to put on the second time, maybe because I was familiar with it already.


Sally Hansen Lace Nail Strips


I'm seriously obsessed with these. I hope my local drugstores have restocked because I definitely need to restock! ;)

Have you tried these yet? What do you think?

Friday, January 28, 2011

Beauty Review: Sally Hansen Nail Strips

The minute my coworker mentioned these babies, I knew I had to have them. I mean, one of the styles is houndstooth (obsessed)! I couldn't find them anywhere online so I decided to shop for them the old fashioned way, by going into the store and looking.

I had heard that Walgreens had them in stock so the first stop was a location close to my work. After a quick inspection of the Sally Hansen section, I determined they were sold out and left.


lace nail strips


Determined, I went to another Walgreens not too far away. I saw a few styles left--mostly the solid colors or the glittered--but their stock was pretty picked-through. I did scope out a set of lace-style wraps and I purchased those, only semi-disappointed that I didn't find the houndstooth ones.


lace nail strips


On the way home, I passed a CVS and decided to stop just in case. It was a total jackpot! They had pretty much every style and color! Not sure if I'd like them or not, I only snatched up the one I had been lusting after--the houndstooth!


houndstooth nails


So what did I think about them?
The application of these strips is extremely quick and easy, especially when compared to nail wraps I've used in the past. The wraps aren't overly sticky and easy enough to lift back up at the beginning of the application process if you're a bit off on the placement.They are also thin enough that I was able to cut off any excess from the sides with my own fingernail. I adore that the strips are double-ended; it makes it a lot easier to find a good fit for your own nails. I also love that these $10 kits come with everything you need to apply the wraps, including a cuticle stick and a nail file. It's amazing how as soon as the process is complete, it really becomes like paint on your nails--it doesn't peel like other wraps I've tried.


Pet the kitty!


I'm going to call these a "must-try" for anyone who likes to do their own nails!

Monday, January 24, 2011

Beauty Review: Marquee Moon

I've been sort of obsessed with Deborah Lippman's Marquee Moon ever since I purchased it at the beginning of January--I just keep applying. I adore the silver and the hexagon-shaped glitter is perfection.

marquee moon


There is a tiny con to this polish...
The glitter doesn't come out on the brush very well.

However, I've found a workaround! Simply close the bottle and shake well before painting each nail. Shaking it pulls the glitter pieces into the brush and makes it really easy spread the glitter evenly. Not too much of a pain, right?

marquee moon


To really thicken the glitter this time around, I applied a lot (probably too many) coats. You can probably see just how thick it is.

Bottom line: I like it lots!

Thursday, January 20, 2011

Half Moon Mani

I've been seeing half moon manicures all over the place lately so I thought I'd try it out with my new Deborah Lippmann polish I reviewed last week, Dark Side of the Moon.


half moon manicure


Using my own half moon as a guide, I painted everything except the half moon at the base of my nail. It took several careful applications to shape a smooth half moon. If you mess up, dip a cotton tip in acetone and carefully remove the mistake. It may take several tries till you develop a technique that works for you. Just be patient--you CAN do this! ;) Repeat the same thing on every nail.

At this point you could seal it up with top coat or you could get a bit more creative. You could choose another polish to paint in the now-empty half moon space. or you could paint a thin line of a contrasting color along the edge of the half moon. Just a couple ideas, but feel free to come up with your own.

Give it a try and send photos of your results to me. If you do, I'll feature them on my blog!

Good luck!

Monday, January 10, 2011

Beauty Review: Dark Side of the Moon

My love affair with Deborah Lippman's polishes continues...
This time it's Dark Side of the Moon!

dark side of the moon


I've had several compliments on this color in the three days that I've been wearing it. It goes on so smooth--I love it! It's looks slightly different under light so I've included a photos both with and without flash.

dark side of the moon


I'm wearing two coats of the color with one coat of Seche Vite on top which helps the glossy finish hold up well.

dark side of the moon


Now I've just got to figure out how to stop myself from buying more colors. I'm obsessed with this stuff!

Thursday, January 6, 2011

Beauty Review: Waking Up In Vegas

While I was visiting family in Utah over the holidays, I visited a store I had never been to in the Gateway Mall in downtown SLC. The store was Apothica and I sort of became obsessed with it. While I was there, I purchased my first two bottles of Deborah Lippman Polish--Marquee Moon and Dark Side of the Moon (I just love how they're all named after songs, don't you?).

After trying out Marquee Moon, I simply fell in love with not only the color, but the smooth, not-too-thick-not-too-thin formula and brush as well. I'm not obsessed with Lippmann Collection polishes. A co-worker saw me looking at the color Waking Up in Vegas (among others), told me she owned that color, and would be willing to bring it in for me to try. This was music to my ears because I already own quite a few polishes in very similar shades--I can't quite justify buying another one.

waking up in vegas


The verdict? I love this color just as much as Marquee moon. I also love that all I need is one coat for a smooth, shiny finish. I didn't even apply a topcoat over it. I would recommend this for anyone looking for a mushroomy-grey-type color. It's fab!

What is your favorite Deborah Lippman polish?

Monday, January 3, 2011

Day 4

Day 04
A Habit that I Wish I Didn't Have

Plaid Target Dress - I have a bad habit

I have a terrible habit of picking polish off of my finger nails. The photo above is from a post in 2008 where you can clearly see this bad habit. I've been doing better about not doing it lately, but the habit still gets me sometimes. This is a big reason why I change my polish so frequently. Any tips on how to stop?

What bad habits do you wish you didn't have?

Wednesday, December 22, 2010

Holiday Ombre

Inspired by the Christmas festivities all around me, I decided to do a fun holiday manicure. I revisited one of my favorite ombre manicure techniques (originally posted back in July).


holiday ombre


This time I used no base color. I applied a sparkly red called Cranberry from e.l.f. with a sponge to create the ombre effect. I deeped the color very tip of the nail by painting it with the brush. Once that was dry, I applied a small amount of a glittery gold e.l.f. polish called Golden Goddess. I'm out of Seche Vite (sadface) so I used my OPI topcoat to seal it all up. Ta da!


holiday ombre manicure - polish selection


Have you created any holiday-themed nail designs? Share your links in the comments!

Christmas kitty says, "Happy Holidays!"

Christmas kitty!

Thursday, September 16, 2010

Polka Dot Nails

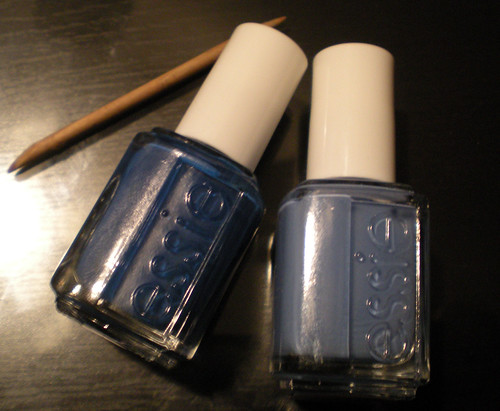
Recently, my roommate asked me to paint her nails for her. She picked two of my colors (Mesmerize and Midnight Cami from Essie) and asked for a polka dot pattern.

polka dot nails


You can easily recreate this polka dot manicure for yourself with a few easy steps and a bit of patience!


You will need:
  • Two bottles of contrasting polish
  • Something to apply the dots with, I used the pointed end of a cuticle stick
  • Top coat of choice

gather your tools

I used the darker color, Midnight Cami, to paint the base color. Make sure to let it dry fully before moving on.
 
Dip the stick in the polish, fully coating the tip.

dip in the polish


You can apply in any order you'd like, but this is the order I find the best for application:

Start your dots closest to the cuticle, in the "corner" of the nail. Keep moving across the nail with a total of three dots.

first three dots


Add two more dots to create the pattern of five dots shown below. Sort of like the "five" side of dice.

five dots


Fill in the rest of the nail following the spacing and direction set by your original five dots.

finish it up


The dots take longer to dry so be very careful to not mess them up before they are fully dry.

Finish it off with your favorite top coat and you've got an adorable polka dot manicure!

I'd love to see your results, so please share!

 
coompax-digital magazine